
WRITTEN APR 2021 · UPDATED JAN 2026
Sourdough Pizza Dough
Already have a trusty starter? Firmly seated aboard the sourdough train?
Then this dough is for you!
I’ve personally used this recipe for over 700 pizzas, and with the help of cool people in Wales and Texas, this recipe was tried and tested in those locations too! Check out their results below.

Starters & timings
Heads up! Your starter and room temperature will define the timing of this recipe.
Go with your starter’s flow
The example timings in the recipe are a guide based on what happens with my starter and room temperature. I’ve shared easy visual cues to look out for, so you can adapt timings based on how your own starter behaves.
What I’m working with
I am using an 80% hydration, dark rye starter. I love the flavour I get with this. Feel free to use a 100% hydration starter if you prefer a less sour dough! Room temperature where I am hovers around 27 – 29°C (80 – 84°F.)
Special thanks to Ed & Timi
With variables like starters and room temperatures, I wanted to test my recipe with others to make sure this recipe is one anyone in the world can count on!
Big thank you to Ed from Wales and Timi from Texas for kindly offering to test drive this recipe and even sharing photos and feedback! Hope you both loved your fantastically-spotty pizzas.

@colonel.ed‘s pizza
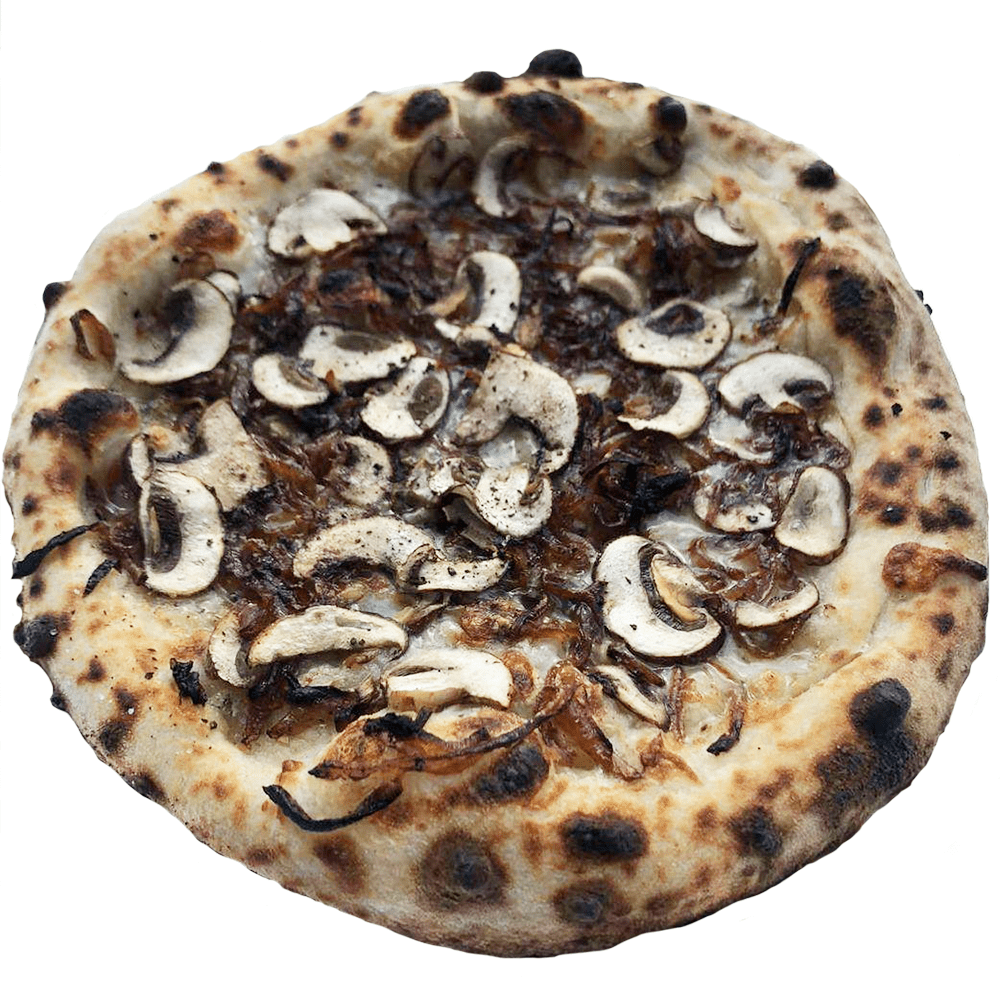
@timisfrenchmacarons‘s pizza
Sourdough Pizza Dough
Makes 3-6 dough balls
30 minutes total hands-on effort
Prepare 1-3 days ahead
Using sourdough starter in a slow dough creates an incredibly flavourful pizza base. The extra flavour will enhance all your pizza toppings, and you’ll find your tomatoes, cheese and anything else you put on your pizza even tastier than before.
- Deciding between 5- 10% inoculation
Inoculation is the amount of starter you are putting into the dough. 5-10% is on the lower end, but I like it because a lower inoculation helps to create a lighter, less bready crust. I mainly decide based on how long I want my dough to bulk ferment for. For my starter and room temp…- 5% = 7 hours bulk fermentation
- 10% = 5 hours. If it’s cold where you are or your starter takes longer than 6 hours to double after feeding, I recommend going for 10%.
- Pizza for the week?
After your dough balls are in the fridge, you can keep them there for up to 10 days, though they tend to be at their best between 48-72 hours. The good cultures you cultivated in the dough ward off bad bacteria from your food. In the past, fermentation was primarily used as a method of preservation and the amazing flavour that develops was a side-benefit. This is also why you’ve never had to worry about your starter growing mold, if you keep it healthy.
Ingredients
| For 3 dough balls | For 6 dough balls |
| 460g strong 00 or bread flour, minimum 12.5% protein (100%) | 920g strong 00 or bread flour, minimum 12.5% protein (100%) |
| 13.8g sea salt (3%) | 27.6g sea salt (3%) |
| 322g water (70%) | 644g water (70%) |
| 23g fed starter (5%) dough balls will be 270g each OR, 46g fed starter (10%) dough balls will be 280g each | 46g fed starter (5%) dough balls will be 270g each OR, 92g fed starter (10%) dough balls will be 280g each |
5 minutes of work
9:00 am (example timing at 26°C / 79°F)
1. Prep starter & autolyse
Give your starter a good 1 : 1 : 1 feed, ensuring that you have enough to use for this recipe. (Optional: give it a pep talk or motivational speech.)
Just after feeding your starter, measure water into a large bowl and add in the flour. Mix briefly for 1-2 minutes to form an autolyse, ensuring all the flour is hydrated. Cover and leave aside until your starter has peaked.
Autolyse?
When flour and water are combined to form an autolyse, the flour gets a head start in developing strong gluten bonds. It’s my favourite, low-effort technique to build strength in pizza dough!
My starter takes about 3 hours to peak after being fed, so that’s how long my autolyse goes for.
12:00 pm
15 minutes of work
2. Form the dough
When your starter has peaked, add it to the autolyse and incorporate it to form your dough. Knead for 10 minutes, then add salt and knead for a further 3 minutes.
- To incorporate the starter into the autolyse, I make a claw shape with the hand I’m using to mix the dough. Then, I dig my clawed hand into the dough and close it into a fist to squeeze the starter into the autolyse, repeating this for the first minute of kneading until there are streaks of starter throughout the dough.
- Then, I switch to the rubaud method to work the dough in the bowl. (Working the dough in the bowl means no counter clean-up!)
- By the end of the kneading, the dough should be fairly smooth and it should be possible to lift it out of the bowl in one mass from all the gluten strength that has been developed.
Why add salt at the end of kneading?
Salt helps to slow down fermentation, which is a benefit for this slow dough. However, kneading it in too early overdevelops the gluten structure due to salt being a superstar at strengthening gluten.
Overdeveloped gluten makes a rubbery pizza that is difficult to stretch and chew. What we’re really after is a balance: dough that is strong enough that it won’t rip on us, yet still has a tender crumb. *chefs kiss*
12:15 pm
Starter does the work
3. Bulk ferment
Cover the dough and leave it to bulk ferment until it has doubled.
Update (2023): this recipe now recommends shooting for a 10% increase in volume! Shortening the initial bulk ferment enables a longer final proof, which allows the dough to develop lots of air for the crust.
- As a guide, here’s how long this step took for others when they used the 10% inoculation version of this recipe at their room temp:
- 18°C / 64°F = 9 hours
- 24°C / 75°F = 6 hours
- 26°C / 79°F = 4 hours
- To help your dough develop better structure and strength for a puffy crust, you can give it up to 3 rounds of stretch and folds, one hour apart (check out the video above for how to do this!)
How do I tell when to stop bulk fermentation?
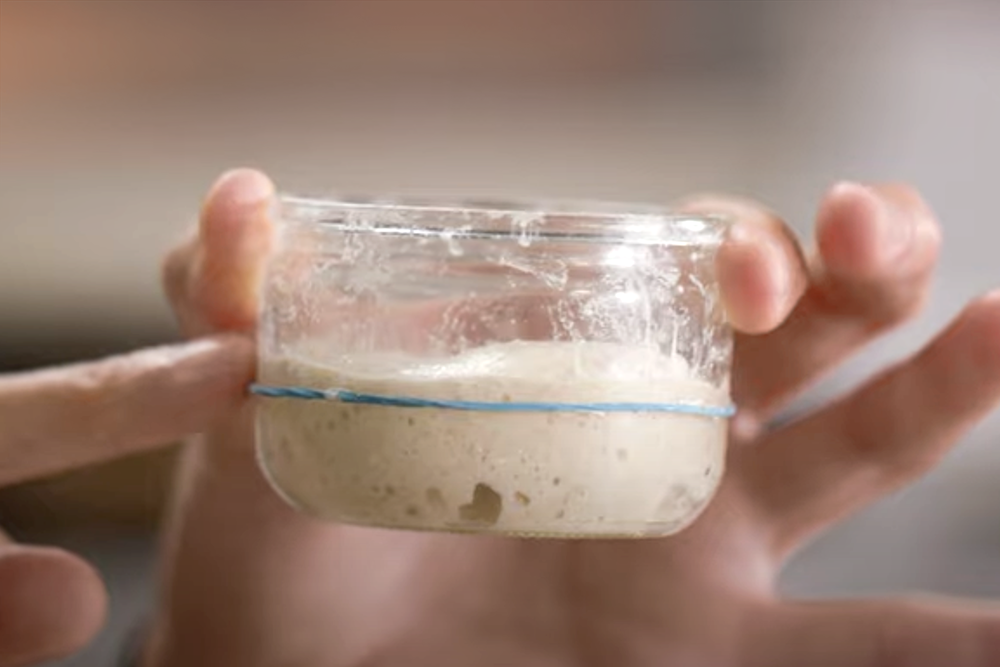
Just after mixing, I like to put a small bit of dough in a container and mark where it comes up to at that point as a test-dough.
When the dough is ready, you can easily see that the test-dough has increased by 10% in height, and developed nice, little bubbles like this one.
15 minutes of work
4:00pm for 10% inoculation,
6:00 pm for 5%, example timing at 26°C / 79°F
4. Divide & cold ferment
Divide your dough into 270g – 280g portions and place them into an air-tight container.
Transfer your dough to the fridge. You can make pizzas with your dough balls whenever you like from this point, but I highly recommend letting it continue developing in the fridge for 2 more days for the most flavourful crusts.
Dough tray v.s. individual containers?
It mainly depends on two things: your available fridge-space and whether you’ll be baking all your dough in one go. Storing dough in individual containers tends to be more space-efficient and allows you to take dough out as needed if you’re baking across several days.
I personally love the Pyrex 2-cup capacity glass containers (not an affiliate link!)
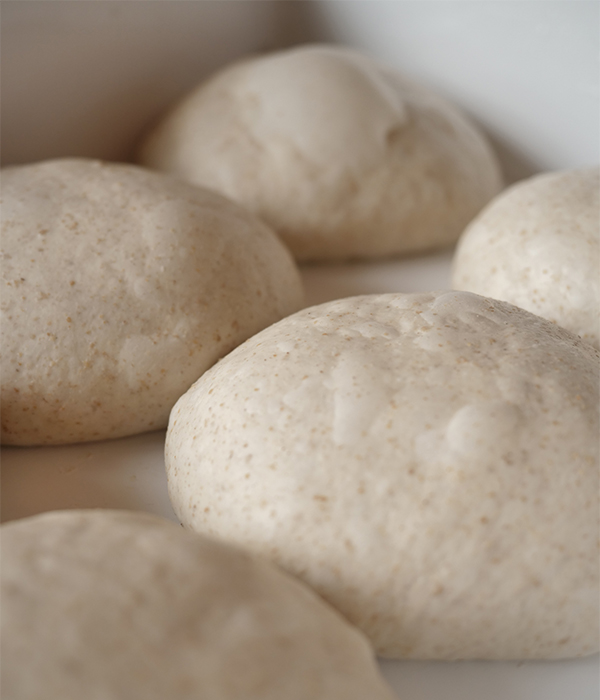
5. Nice dough balls!
When you’re ready to use your dough, take it out of the fridge, ball up and allow to final proof for:
- 3-4 hours, if you’re in a warm climate
- 6-8 hours, if it’s cold where you are
Keep the dough balls covered during this final proof. The dough should be relaxed by the end of final proof and jiggle like jelly when you shake them in their container.
30 minutes before it’s time to make pizza, preheat your pizza oven to 400°C / 750°F stone temperature. (If using a home oven, this guide is for you!)
How to form dough balls for pizza
Here are 2 simple tricks for shaping your dough balls. If you’re not used to handling dough, you may find it a bit sticky at first, so check this out!
To stretch your dough…
Check out my tutorial on how to stretch your dough into a pizza base; focused on achieving a puffy crust! I tried to pack in as much useful info as possible, in under 5 mins!
Q&As
1 What if my flour is less than 13% protein?
If your flour’s protein content is in the 11-12% range, I recommend dropping the hydration down to 65% and doing a few rounds of stretch and folds to build strength. This will slightly reduce the puffiness of your pizza crust, but it will ensure your dough is still good to work with! A strong flour helps your dough to stay intact after the long fermentation and high hydration.
2 Can I use whole wheat, rye or other whole flours?
Yes! I’ve experimented with these, and have found that substituting 5% of the total flour with these whole flours imparts wonderful, additional flavour without compromising on the airy crumb.
At 10% and above, the crust becomes denser and the textures unique to those flours start to take over. Rye gives a gummier crust; and with whole wheat, you notice the bran. I enjoyed these too, so it just depends what you’re shooting for with your crust!
3 I don’t have a starter, what should I do?
You can try out my Intro Dough recipe which uses instant yeast, or you can take the leap and start a starter of your own! I liked this guide over at The Perfect Loaf which is thorough and has lots of photos. I highly recommend using rye flour for your starter. The enzymes in rye flour give the yeasts that will develop a great boost, and its natural sourness makes your pizza base taste great!
4 How can I get a puffy crust?
The key to getting a puffy crust is creating air in your dough and then preserving it! Your dough is like a balloon – if you work to develop the gluten in your dough (kneading, stretch and folds, salt and time all help), you will end up with a stronger balloon that is better at keeping air in without popping.
Allow your dough to final proof until it’s relaxed and airy – it should jiggle when you shake it. Then, be gentle and keep as much air in the dough as possible when you are opening your pizza base. This is how I handle my dough to get puffy crusts.


Hi,
I am currently giving this recipe a go after making my first sourdough starter for the first time! I have followed all video/recipe directions but my dough is wet and sticky and wouldn’t get to a point of a non sticky smooth dough, it possible to over knead? as I kneaded for a while at both stages before and after adding salt as I didn’t want to give up. Also is there any way of rescuing the dough before using if it is too wet/sticky? Hoping it turns out ok at the end result! Not expecting perfection by any means haha. Any advice for my future attempts would be great!
Thank you
Hi Antonia, that’s so cool to hear you have a new starter for your baking adventures! You are correct: it is possible to over knead and once the gluten network in the flour is torn apart it cannot bind again. For future batches, the video has visual cues for kneading. Once salt is added, you just need to mix until it’s dissolved into the dough.
To try rescuing the dough, one option is to add the same amount of flour, water and salt as you used for the original batch. You’re basically use the previous dough as a preferment. Expect the bulk ferment to be much faster and be ready to transfer it to the fridge when it hits the 10% rise. Alternatively, you can also just use the weakened dough in any sourdough discard recipe (pancakes, waffles, crackers etc.)
Hope this helps and that your next batches are a smash hit!
Thank you so much, your help and dough recipe is the best! It’s really helped my pizza game and my sourdough knowledge a lot.
Hi Justin, thank you so much for taking the time to leave me such a lovely comment. I’m genuinely happy to know you’ve found what I’ve shared helpful in your practice – wishing you many great bakes ahead!
Tips on freezing dough balls?
Thanks much – love your content and passion.
Hey! Thank you very much for your kind words. Freezing sourdough successfully tends to depend on your starter’s particular colony. Some starters are unaffected by freezing, while others don’t really bounce back after thawing. I’d say it’s worth a shot to try with a couple of dough balls to see how it goes with your own starter. 🙂
To freeze dough:
Follow the recipe as normal until portioning the dough in Step 4. Roll them loosely into dough balls (just for easier handling) and give each a light coating of extra-virgin olive oil. Put each dough ball into its own zip-loc bag or air-tight container before transferring them to the freezer. (If using a zip-loc bag, try to leave as little air in the bag as possible before sealing.)
To thaw:
The day before you want to make pizza, take the dough balls you need out of their bags/containers and place in a lidded dough box or individual air-tight containers (with a little room for them to grow) in the fridge to gently thaw. Continue from step 5 onwards. When you take the dough out of the fridge for their final proof, you can give them a reball for one last boost. Then, with a bit of starter tenacity, the dough will final proof as normal and develop air.
Hope this helps!
Hi Feng!!
Your recipe/video have done more to help me level up my pizza game than anything else I’ve watched or read. So first off, thank you so much!
I was wondering, after the cold proofing step, how long do you wait after removing the dough from the fridge before you ball the dough up? My dough comes out of the fridge very very stiff and when I try to ball it up cold, it never fully comes to room temperature, even after 10 plus hours of final proofing. Any suggestions?
thanks!
Hi Tyler! Ah wow, thank you so much for sharing your kind feedback – I’m so happy to know you found my recipe and video helpful!
I ball the dough immediately after it comes out from the fridge. However, it sounds like it might be quite cold where you are based if it doesn’t come to room temp even after 10+ hours of final proof! I recommend balling the dough straight out of the fridge (the stiffness actually helps to make reballing easy) and then putting the dough in your home oven with just the oven light on. This basically converts your home oven into a proofer which will help the dough gradually warm up, relax and develop air.
This will also speed up the duration of your final proof. 🙂
Feng, Thanks so much! I will try this. It seems like what is happening is that I am balling it so tight while it is cold that the inside parts of the dough ball are insulated really well from the room and some of those tight inside parts stay cold(er). Then when I am stretching those small pockets of cold dough stretch unevenly compared to the rest of the base causing it to rip just in those places.
Do you ball it really tight from the fridge or just a few tucks underneath with the scraper? I wonder if I am overworking the ball and compacting it too much.
Ah I see! One more option for you is to ball up after bulk fermentation before transferring the dough to the fridge in step 4, instead of balling before final proof. This would require a dough tray that can fit in your fridge and would allow the dough ball to relax out during cold fermentation. With a less dense profile, your dough will be more likely to get to room temp in the center.
The default recommendation of the recipe is to ball up after cold ferment because it gives the option of storing dough balls individually for space-efficiency in the fridge and it gives the dough a final boost of strength for final proof. However, in your case it would be better to allow the dough to relax out if you can fit the dough tray in the fridge. 🙂 Hope this helps!!
Hi! I’ve been using your Intro Pizza Dough recipe for a while (which has been great!) – and now, armed with a sourdough starter, ready to take the leap into sourdough pizza dough!
Do you have a loose timeline that you find most convenient for your dough prep days for your process/recipe?
Hey Jason, I’m so glad you’ve enjoyed making my Intro Dough and welcome aboard the sourdough train! 🙂 Please adjust my timing to account for the speed of your starter and room temp. The rough schedule I follow is already provided in the red text of the recipe but to summarise briefly:
9am: step 1, give my starter a 1:1:1 feed and autolyse dough
12pm: step 2, my starter has reached peak (which is past double for Saturday) in 3 hours, knead for 10 minutes then add
Bulk ferment until test dough has risen by 10%
4:00pm for 10% inoculation
6:00 pm for 5%
Hope this helps and happy baking!
Hey Adarsh, thank you for your very kind comment! I’m so happy to know that you’ve found what I share useful. 🥰
I personally LOVE working with sourdough for the extra flavour, so that’s what I’m using 99% of the time. When I play around with different flours, it’s so cool to taste the results that occur from the unique characteristics of the flour combined with my starter’s hard work!
I am curious… You mention using a 00 flour with 13%+ protein for this recipe. Which flour brands are your favorite in that range? Are there any that perform/taste much better to you? Do you ever blend 00 and bread flours? If so what ratios do you like?
Hey Tyler,
I always blend 00 and bread flours! When playing with a new flour, I like starting with a baseline ratio of 70:30 (00:bread) and seeing how the dough behaves. Caputo Blue is my favourite standard 00 flour as it’s consistent and readily available in most countries around the world – a really useful constant when I’m doing pop-ups in different countries. Right now, I’m also testing out Molino Casillo’s soft wheat flour as well. Hope this helps!
Hi Feng,
Is leoparding achieved by the lack of residual sugars at the end of proofing after a long cold fermentation? What is the most impactful factor?
Thank you!
Alex
Hey Alex,
Leopard spots are achieved by creating and trapping lots of air in the dough through fermentation. Micro air bubbles on the surface of the crust swell during the bake (due to the water in the dough turning into steam) which then char at high heat! 🙂
Cheers,
Feng
Thanks Feng…love this recipe!
Tried it once to prove I could make dough before investing in a roccbox. It was a success so I now have a roccbox and baking my first pizza in it tonight.
Does the final proof (5) step time also depend on how long the cold fermentation in the fridge has gone on for? i.e. should final proof be shorter if the dough has been in the fridge for 3 days vs 2 days?
Its winter in Sydney now so kitchen room temperature is around 18-19 degrees C. That would mean final proof for around 6 hours? If I proof the dough in the oven with the light on it would be closer to 22-23 degrees C so around 4 hours final proof?
Hey George, I’m so happy to hear you love my recipe! That’s absolutely correct, however the different in final proof time between 2-3 days would only be half an hour or an hour depending on room temp. The timings you’ve mentioned seem about right, but ultimately it will depend on your flour and how active your yeast is as well as temp as you mentioned, so best is to follow the visual cues as shown in the video. Once you’ve followed the same process a couple of times, then you can be certain of the timings!
This recipe is so incredible. Its a go to and it is absolutely perfect. I had to get a new fridge so for space concerns, could we leave it to bulk ferment in the fridge and just portion it out the day of? Thanks so much 🙂
Hey Tom, I’m glad to hear you’re enjoying my recipe! If transferring to the fridge as a bulk dough, I’d reduce the room temp ferment by an hour to compensate for the dough taking longer to cool through, then portion it on the day of as you mentioned. 🙂