
WRITTEN APR 2021 · UPDATED JAN 2026
Sourdough Pizza Dough
Already have a trusty starter? Firmly seated aboard the sourdough train?
Then this dough is for you!
I’ve personally used this recipe for over 700 pizzas, and with the help of cool people in Wales and Texas, this recipe was tried and tested in those locations too! Check out their results below.

Starters & timings
Heads up! Your starter and room temperature will define the timing of this recipe.
Go with your starter’s flow
The example timings in the recipe are a guide based on what happens with my starter and room temperature. I’ve shared easy visual cues to look out for, so you can adapt timings based on how your own starter behaves.
What I’m working with
I am using an 80% hydration, dark rye starter. I love the flavour I get with this. Feel free to use a 100% hydration starter if you prefer a less sour dough! Room temperature where I am hovers around 27 – 29°C (80 – 84°F.)
Special thanks to Ed & Timi
With variables like starters and room temperatures, I wanted to test my recipe with others to make sure this recipe is one anyone in the world can count on!
Big thank you to Ed from Wales and Timi from Texas for kindly offering to test drive this recipe and even sharing photos and feedback! Hope you both loved your fantastically-spotty pizzas.

@colonel.ed‘s pizza
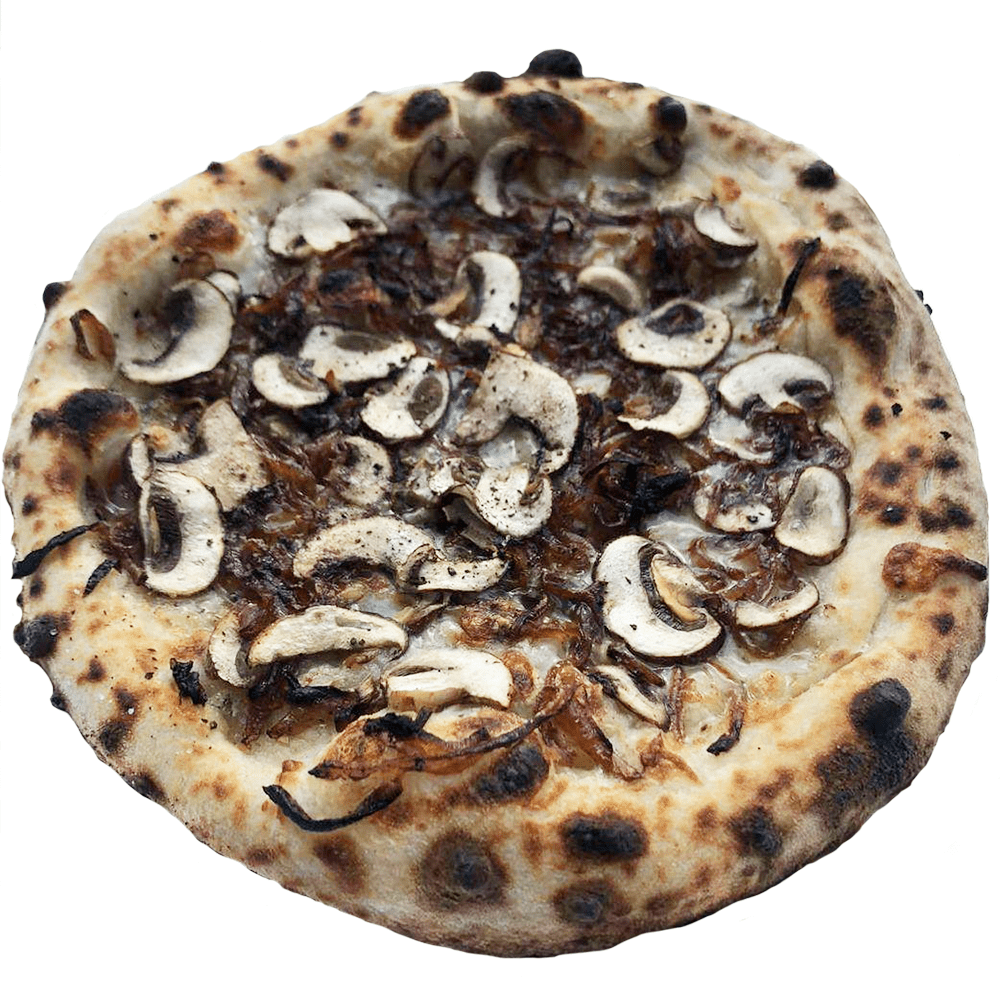
@timisfrenchmacarons‘s pizza
Sourdough Pizza Dough
Makes 3-6 dough balls
30 minutes total hands-on effort
Prepare 1-3 days ahead
Using sourdough starter in a slow dough creates an incredibly flavourful pizza base. The extra flavour will enhance all your pizza toppings, and you’ll find your tomatoes, cheese and anything else you put on your pizza even tastier than before.
- Deciding between 5- 10% inoculation
Inoculation is the amount of starter you are putting into the dough. 5-10% is on the lower end, but I like it because a lower inoculation helps to create a lighter, less bready crust. I mainly decide based on how long I want my dough to bulk ferment for. For my starter and room temp…- 5% = 7 hours bulk fermentation
- 10% = 5 hours. If it’s cold where you are or your starter takes longer than 6 hours to double after feeding, I recommend going for 10%.
- Pizza for the week?
After your dough balls are in the fridge, you can keep them there for up to 10 days, though they tend to be at their best between 48-72 hours. The good cultures you cultivated in the dough ward off bad bacteria from your food. In the past, fermentation was primarily used as a method of preservation and the amazing flavour that develops was a side-benefit. This is also why you’ve never had to worry about your starter growing mold, if you keep it healthy.
Ingredients
| For 3 dough balls | For 6 dough balls |
| 460g strong 00 or bread flour, minimum 12.5% protein (100%) | 920g strong 00 or bread flour, minimum 12.5% protein (100%) |
| 13.8g sea salt (3%) | 27.6g sea salt (3%) |
| 322g water (70%) | 644g water (70%) |
| 23g fed starter (5%) dough balls will be 270g each OR, 46g fed starter (10%) dough balls will be 280g each | 46g fed starter (5%) dough balls will be 270g each OR, 92g fed starter (10%) dough balls will be 280g each |
5 minutes of work
9:00 am (example timing at 26°C / 79°F)
1. Prep starter & autolyse
Give your starter a good 1 : 1 : 1 feed, ensuring that you have enough to use for this recipe. (Optional: give it a pep talk or motivational speech.)
Just after feeding your starter, measure water into a large bowl and add in the flour. Mix briefly for 1-2 minutes to form an autolyse, ensuring all the flour is hydrated. Cover and leave aside until your starter has peaked.
Autolyse?
When flour and water are combined to form an autolyse, the flour gets a head start in developing strong gluten bonds. It’s my favourite, low-effort technique to build strength in pizza dough!
My starter takes about 3 hours to peak after being fed, so that’s how long my autolyse goes for.
12:00 pm
15 minutes of work
2. Form the dough
When your starter has peaked, add it to the autolyse and incorporate it to form your dough. Knead for 10 minutes, then add salt and knead for a further 3 minutes.
- To incorporate the starter into the autolyse, I make a claw shape with the hand I’m using to mix the dough. Then, I dig my clawed hand into the dough and close it into a fist to squeeze the starter into the autolyse, repeating this for the first minute of kneading until there are streaks of starter throughout the dough.
- Then, I switch to the rubaud method to work the dough in the bowl. (Working the dough in the bowl means no counter clean-up!)
- By the end of the kneading, the dough should be fairly smooth and it should be possible to lift it out of the bowl in one mass from all the gluten strength that has been developed.
Why add salt at the end of kneading?
Salt helps to slow down fermentation, which is a benefit for this slow dough. However, kneading it in too early overdevelops the gluten structure due to salt being a superstar at strengthening gluten.
Overdeveloped gluten makes a rubbery pizza that is difficult to stretch and chew. What we’re really after is a balance: dough that is strong enough that it won’t rip on us, yet still has a tender crumb. *chefs kiss*
12:15 pm
Starter does the work
3. Bulk ferment
Cover the dough and leave it to bulk ferment until it has doubled.
Update (2023): this recipe now recommends shooting for a 10% increase in volume! Shortening the initial bulk ferment enables a longer final proof, which allows the dough to develop lots of air for the crust.
- As a guide, here’s how long this step took for others when they used the 10% inoculation version of this recipe at their room temp:
- 18°C / 64°F = 9 hours
- 24°C / 75°F = 6 hours
- 26°C / 79°F = 4 hours
- To help your dough develop better structure and strength for a puffy crust, you can give it up to 3 rounds of stretch and folds, one hour apart (check out the video above for how to do this!)
How do I tell when to stop bulk fermentation?
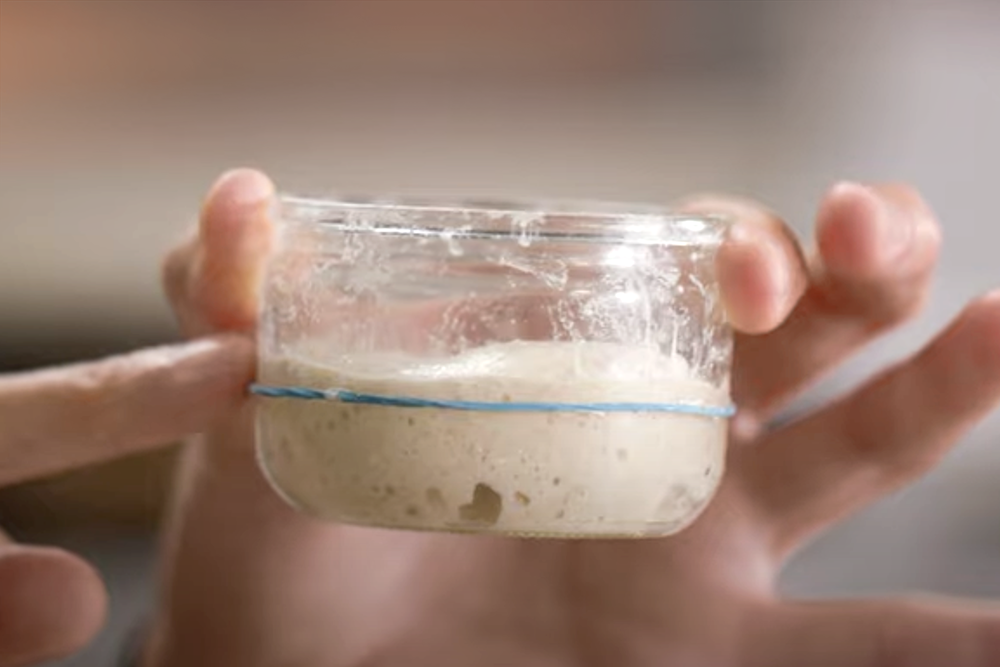
Just after mixing, I like to put a small bit of dough in a container and mark where it comes up to at that point as a test-dough.
When the dough is ready, you can easily see that the test-dough has increased by 10% in height, and developed nice, little bubbles like this one.
15 minutes of work
4:00pm for 10% inoculation,
6:00 pm for 5%, example timing at 26°C / 79°F
4. Divide & cold ferment
Divide your dough into 270g – 280g portions and place them into an air-tight container.
Transfer your dough to the fridge. You can make pizzas with your dough balls whenever you like from this point, but I highly recommend letting it continue developing in the fridge for 2 more days for the most flavourful crusts.
Dough tray v.s. individual containers?
It mainly depends on two things: your available fridge-space and whether you’ll be baking all your dough in one go. Storing dough in individual containers tends to be more space-efficient and allows you to take dough out as needed if you’re baking across several days.
I personally love the Pyrex 2-cup capacity glass containers (not an affiliate link!)
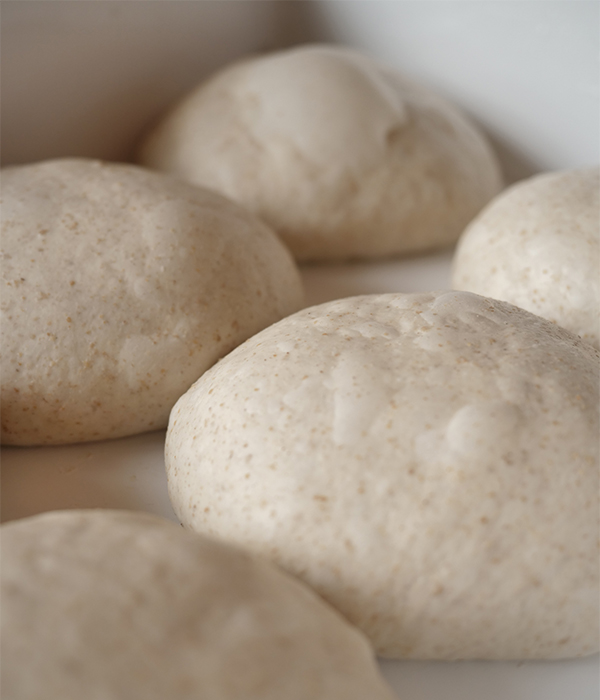
5. Nice dough balls!
When you’re ready to use your dough, take it out of the fridge, ball up and allow to final proof for:
- 3-4 hours, if you’re in a warm climate
- 6-8 hours, if it’s cold where you are
Keep the dough balls covered during this final proof. The dough should be relaxed by the end of final proof and jiggle like jelly when you shake them in their container.
30 minutes before it’s time to make pizza, preheat your pizza oven to 400°C / 750°F stone temperature. (If using a home oven, this guide is for you!)
How to form dough balls for pizza
Here are 2 simple tricks for shaping your dough balls. If you’re not used to handling dough, you may find it a bit sticky at first, so check this out!
To stretch your dough…
Check out my tutorial on how to stretch your dough into a pizza base; focused on achieving a puffy crust! I tried to pack in as much useful info as possible, in under 5 mins!
Q&As
1 What if my flour is less than 13% protein?
If your flour’s protein content is in the 11-12% range, I recommend dropping the hydration down to 65% and doing a few rounds of stretch and folds to build strength. This will slightly reduce the puffiness of your pizza crust, but it will ensure your dough is still good to work with! A strong flour helps your dough to stay intact after the long fermentation and high hydration.
2 Can I use whole wheat, rye or other whole flours?
Yes! I’ve experimented with these, and have found that substituting 5% of the total flour with these whole flours imparts wonderful, additional flavour without compromising on the airy crumb.
At 10% and above, the crust becomes denser and the textures unique to those flours start to take over. Rye gives a gummier crust; and with whole wheat, you notice the bran. I enjoyed these too, so it just depends what you’re shooting for with your crust!
3 I don’t have a starter, what should I do?
You can try out my Intro Dough recipe which uses instant yeast, or you can take the leap and start a starter of your own! I liked this guide over at The Perfect Loaf which is thorough and has lots of photos. I highly recommend using rye flour for your starter. The enzymes in rye flour give the yeasts that will develop a great boost, and its natural sourness makes your pizza base taste great!
4 How can I get a puffy crust?
The key to getting a puffy crust is creating air in your dough and then preserving it! Your dough is like a balloon – if you work to develop the gluten in your dough (kneading, stretch and folds, salt and time all help), you will end up with a stronger balloon that is better at keeping air in without popping.
Allow your dough to final proof until it’s relaxed and airy – it should jiggle when you shake it. Then, be gentle and keep as much air in the dough as possible when you are opening your pizza base. This is how I handle my dough to get puffy crusts.


So amazing! Thank you!
Could I weigh out and shape after cold fermenting (meaning bulk dough in the fridge) or is this more likely to over proof?
Hey Ella, you absolutely may! If transferring to the fridge as a bulk dough, I’d reduce the room temp ferment by an hour to compensate for the dough taking longer to cool through. 🙂
Hello Feng,
My dough balls end up relaxed but not double in size at the end of the final proof period (well over 6 hrs). Which tells me they lack trapped air inside.
But my Dark eye sourdough starter triples in size within 24 hrs of inception. And I made sure to wait at least till it’s refreshed and reaches its peak before incorporating to my just now autolysed dough.
What could be going wrong here?
Hey Prince, it sounds like at your room temp, the dough needs a bit more time to ferment. For comparison, my rye starter triples in size in about 6 hours at 28C (82F) room temp.
To get your dough balls to double without making your final proof too long, you can extend the fermentation at the bulk ferment step. Try allowing the dough to reach 150% volume and if the final proof time required for the dough balls to double is still longer than 6 hours, you could allow the dough to double at bulk ferment. I recommend gradually increasing the BF until you find your sweet spot because sourdough is more susceptible to over-fermentation than yeasted dough. Hope this helps!
Hey Feng, really excited to try out this recipe! Is there any chance you have instructions for forming the dough in a stand mixer like a KitchenAid or Famag instead of by hand?
Hey David, to make this dough using a stand mixer start by following step 1 as normal, forming the autolyse in your mixer on its lowest setting until all the flour has been hydrated (about 1-2 mins).
Then at step 2, add the starter to the autolysed dough and mix on low speed for 9 minutes. Mix on high speed for 1 minute, then add salt and mix on medium speed for 1 minute.
Be careful not to overmix the dough which will result in weakened gluten strands!
Machine-kneading also tends to heat the dough more than hand-kneading so it’s worth keeping an eye on the temperature of the dough to ensure it does not exceed 26°C / 78°F. If your dough starts to overheat, stop mixing and allow it to rest for 5 minutes before continuing.
Hope this helps!
Hello there!!! Thanks a lot for you amazing recipes and advise!! 😻🙏
Can you please share information on machine mixing sourdough pizza dough??
i have use ice cold water +ice cubes and i freeze my flour before mixing so i can maintain the temperature lower than 24*C
i live in Greece so it’s super hot during summer..
how can i autolyse?? I know that it makes big difference on the final outcome for sourdough bread.. same for pizza dough?
should i mix bit longer on first speed only?
thank you in advance!!
💜
Hey Despina, to make this dough using a stand mixer start by following step 1 as normal, forming the autolyse in your mixer on its lowest setting until all the flour has been hydrated (about 1-2 mins). You can put the autolyse in the fridge so that it cools dough before you mix it again in step 2.
Then at step 2, add the starter to the autolysed dough and mix on low speed for 9 minutes. Mix on high speed for 1 minute, then add salt and mix on medium speed for 1 minute.
If your dough starts to overheat, stop mixing and allow it to rest for 5 minutes before continuing.
Hope this helps!
Can I use 00 tipo pizza flour and if I was what would be the adjustments. I use caputo btw.
Hey Lenny, yes! Use Caputo 00 with this recipe as-is
Thanks for your great video and detailed recipe.
My test jar was about half as wide as your one. At 25C for 9 hours it didn’t rise at all. Though the dough in the main bowl proofed enough to use for a sourdough loaf. So might my test jar have failed because it was too small?
Also with the test dough do you just add it back to the main dough before dividing into balls?
Hey Andrew, that’s interesting! Could it be because your room temp was quite cold and the test dough cooled at a much faster rate than the main dough because it was so small? The test dough should be added back to the main dough when dividing as you mentioned. 🙂
Can you freeze the dough for future use?
Hey! Freezing sourdough successfully tends to depend on your starter’s particular colony. Some starters are unaffected by freezing, while others don’t really bounce back after thawing. I’d say it’s worth a shot to try with a couple of dough balls to see how it goes with your own starter. 🙂
To freeze dough:
Follow the recipe as normal until portioning the dough in Step 4. Roll them loosely into dough balls (just for easier handling) and give each a light coating of extra-virgin olive oil. Put each dough ball into its own zip-loc bag or air-tight container before transferring them to the freezer. (If using a zip-loc bag, try to leave as little air in the bag as possible before sealing.)
To thaw:
The day before you want to make pizza, take the dough balls you need out of their bags/containers and place in a lidded dough box or individual air-tight containers (with a little room for them to grow) in the fridge to gently thaw. Continue from step 5 onwards. When you take the dough out of the fridge for their final proof, you can give them a reball for one last boost. Then, with a bit of starter tenacity, the dough will final proof as normal and develop air.
Hope this helps!
oops just seeing this, I did freeze all of them but I did all the steps and put them in small containers and froze like that. I didn’t do Olive oil tho
maybe bags would of been easier in space … I’ll try that. I’m doing another batch right now .
What happens if I feed 1:2:2 ??
hi Feng! I’ve been running a small pizza pop up with a biga recipe that has served me well, but I’d really like to move to natural leavening. The only challenge for me is that I’d prefer to avoid refrigeration in the process.
how would you adjust timeframes without any cold fermentation in the process? Thanks!